Connect your scanner.
Connection instructions
Lab contact email
lab@ivorymade.com
Before you start. Sign in to your clinic's Dental Cloud account as an administrator to request a lab connection.
Open connections
Open the clinic's Connection page and choose + New Labs in the top-right corner (called New in some versions).
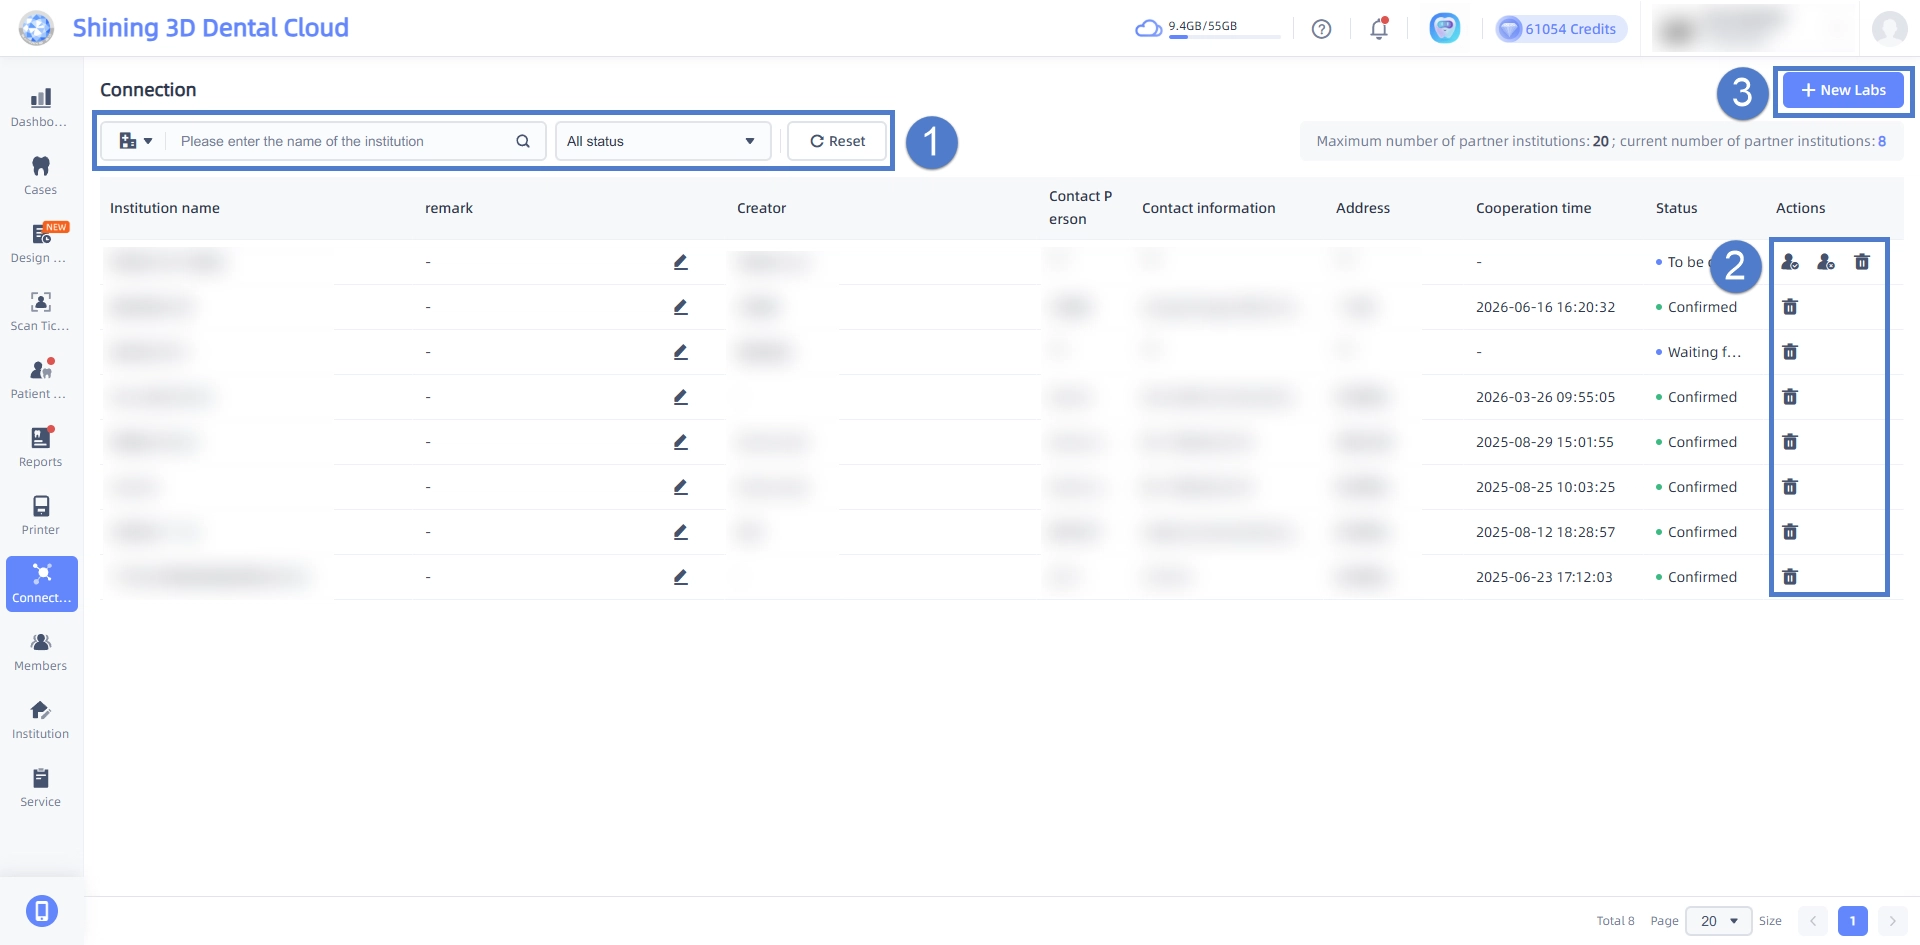
Example screen from Shining 3D (opens in a new tab). Use Ivorymade’s lab details. Search for Ivorymade
Search for Ivorymade by institution name. Check the lab details against lab@ivorymade.com; ask us for help if the listing is unclear.
Confirm the request
Choose + New Labs for the correct listing, then Confirm to invite the lab to connect.
Wait for lab acceptance
Return to your connections and check that the lab has accepted before sending an order.
What happens next?
An Ivorymade lab administrator needs to accept the connection request. A request in your connection list is not proof that the connection is ready to use.
Connected? Send your first case.
Once the lab connection is confirmed, choose Ivorymade when sending your scan. Use your Ivorymade account for the Rx details and case communication. You can also upload STL files in the portal chat with your Rx.
Another scanner or an STL export? Ask us about your submission options.